How to Install PassiveWP?

To get started with PassiveWP, visit the website and buy the desired package. You will receive the plugin files via the email. Download the file and follow the steps below:

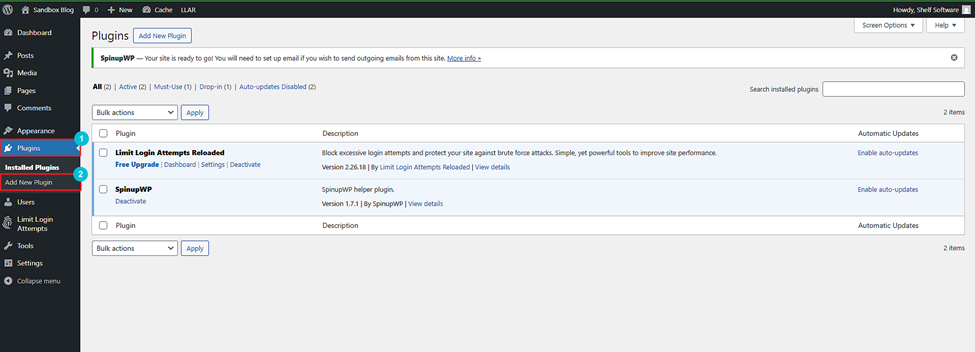
  • Go to your WordPress dashboard.
  • Click on Plugins in the left navigation menu.
  • Click on Add New Plugin.
WordPress dashboard showing the "Installed Plugins" page. Two plugins are listed: "Limit Login Attempts Reloaded" and "SpinupWP," with options to activate, enable, or disable auto-updates.
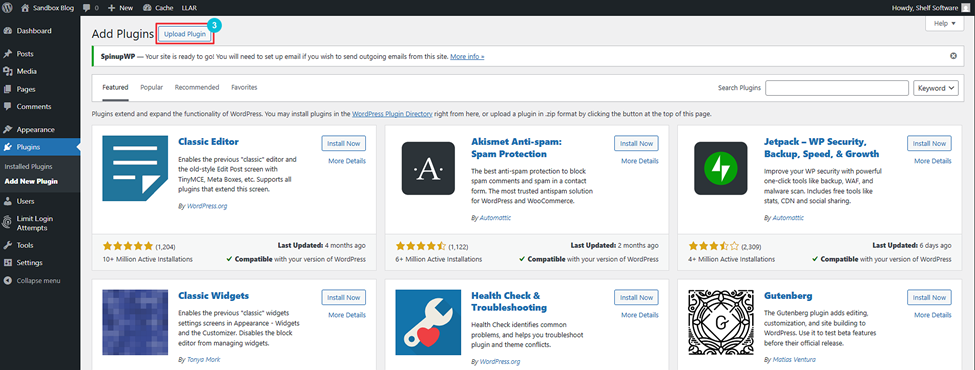
  • Click on the Upload Plugin button at the top of the screen.
WordPress dashboard showing the "Add Plugins" page with various plugin options such as Classic Editor, Jetpack, and Gutenberg, each with an "Install Now" button.
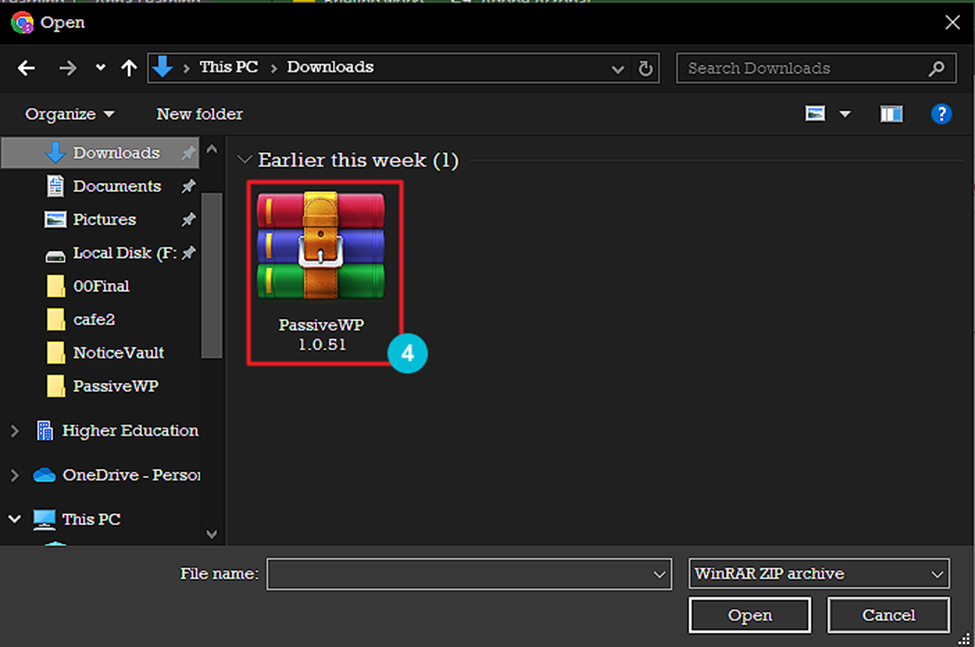
  • Browse and upload the downloaded file (passivewp – [version].zip).
File explorer window showing a list of folders on the left and a highlighted zip file named "PassiveWP 1.0.5.1" on the right.
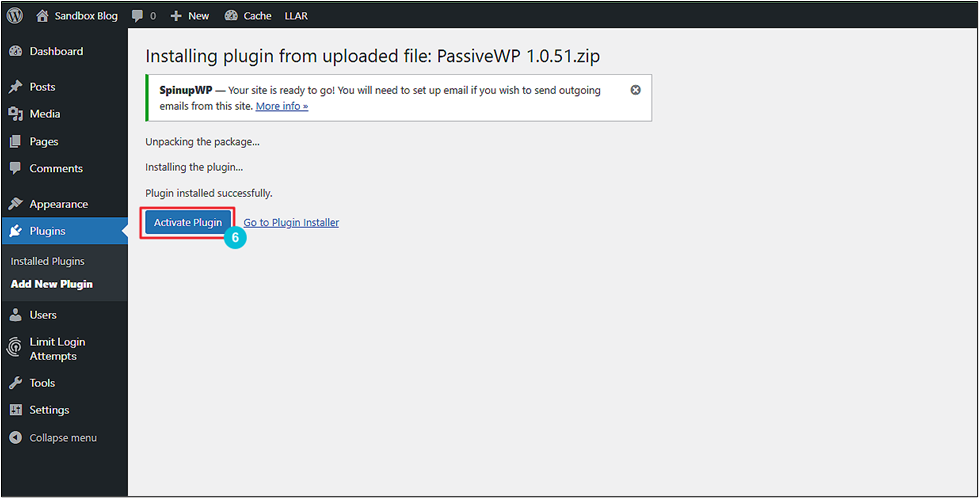
  • Click on the Install Now button.
WordPress plugin installation page displaying various plugin options like Classic Editor, Akismet Anti-Spam, and Jetpack, with an option to upload a plugin.
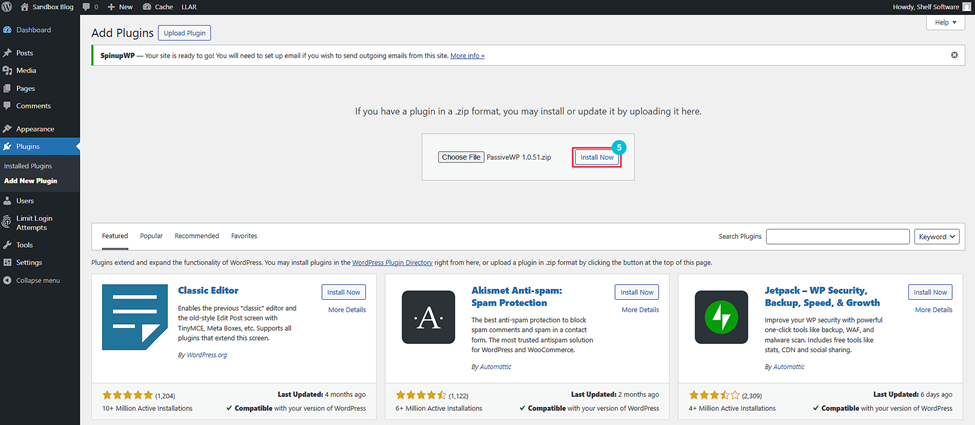
  • Wait for the installation to complete, then click the Activate Plugin button.
Screenshot of WordPress dashboard showing successful installation of PassiveWP plugin, version 1.0.51. The "Activate Plugin" button is highlighted in blue.
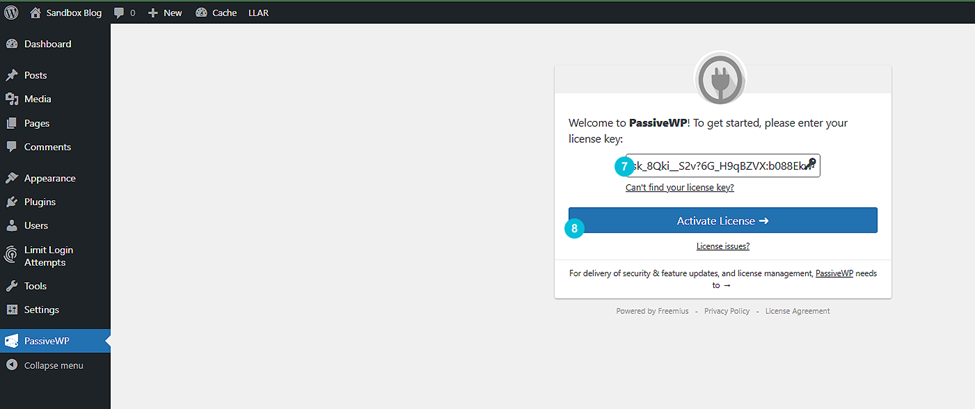
  • Now, enter the license key provided to you via the email.
  • Click on Activate License.
Screenshot of a WordPress plugin setup page for PassiveWP, prompting the user to enter and activate a license key.

The plugin will install successfully.

What are your feelings
Updated on April 9, 2025