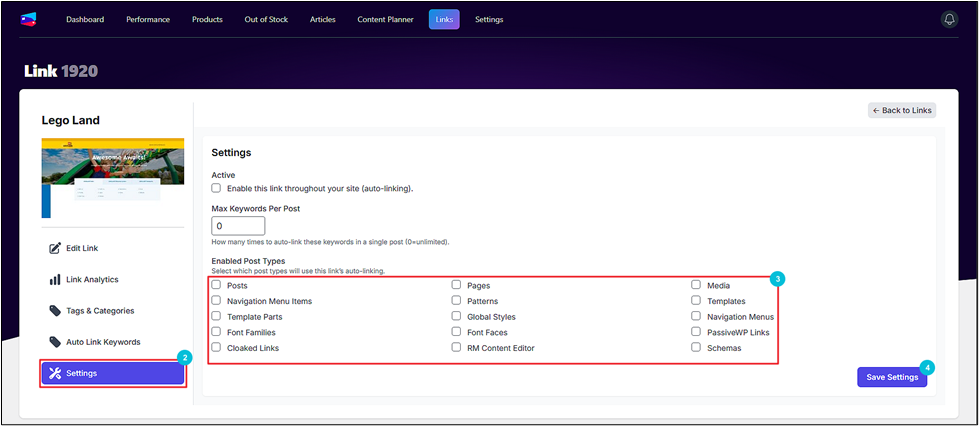
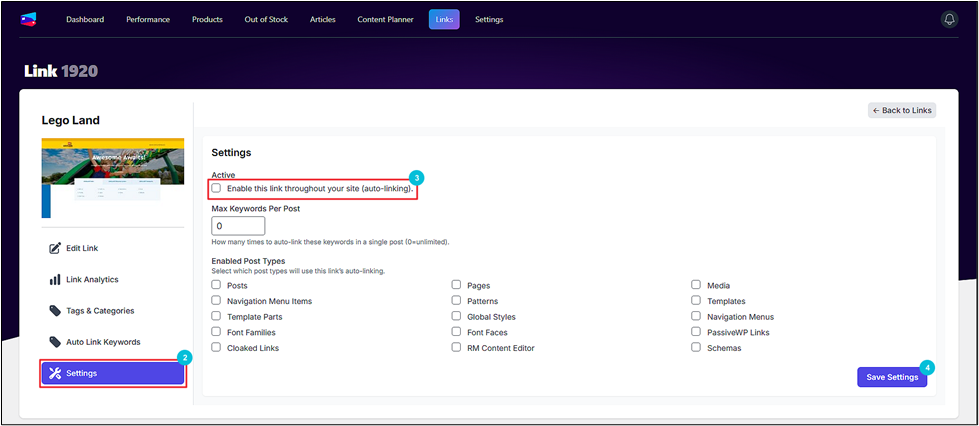
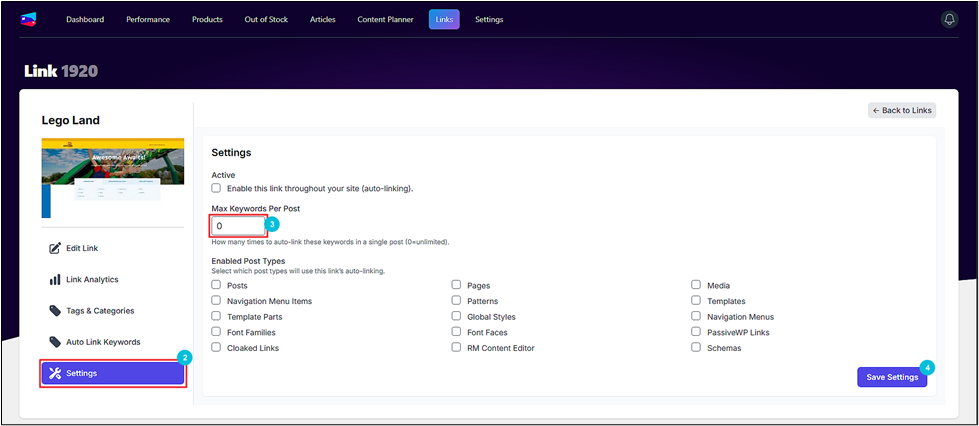
The Settings tab allows you to enable the link throughout your website. Auto-linking does not work unless you enable this option in the link settings. Moreover, you can set up the maximum number of times a keyword should be auto-linked throughout the post. Furthermore, you can select the post types using the link’s auto-linking.
How to Activate Auto-Linking? #
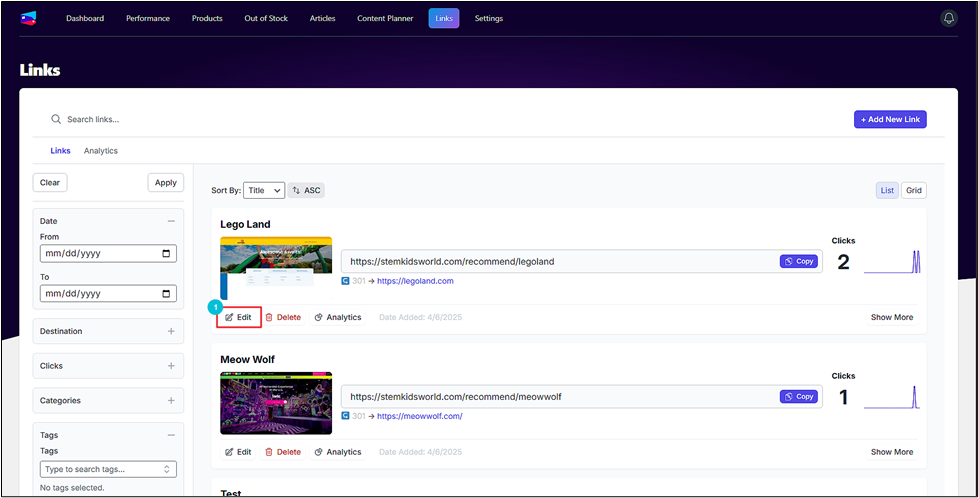
- Click on the Edit underneath the link.
- Switch to the Settings tab.
- Mark the checkbox under the Active section.
- Click Save Settings.
How to Set Maximum Keywords? #
- Click on the Edit underneath the link.

- Switch to the Settings tab.
- Enter the maximum number of keywords you want to auto-link per post.
- Click Save Settings.
How to Enable or Disable Post Types? #
- Click on the Edit underneath the link.

- Switch to the Settings tab.
- Select the post types for which you want auto-linking to be enabled.
- Click Save Settings.